My 10-step process for planning unputdownable mystery-thriller novels
Writing a novel is a bit like sighting Everest on the horizon and saying, “Sure, OK, I’ll climb that.” The struggle to reach the summit can be so overwhelming that I’ve learned to do a lot of preparatory work up front. Here’s what my novel planning process looks like:
Step 1. Brainstorming
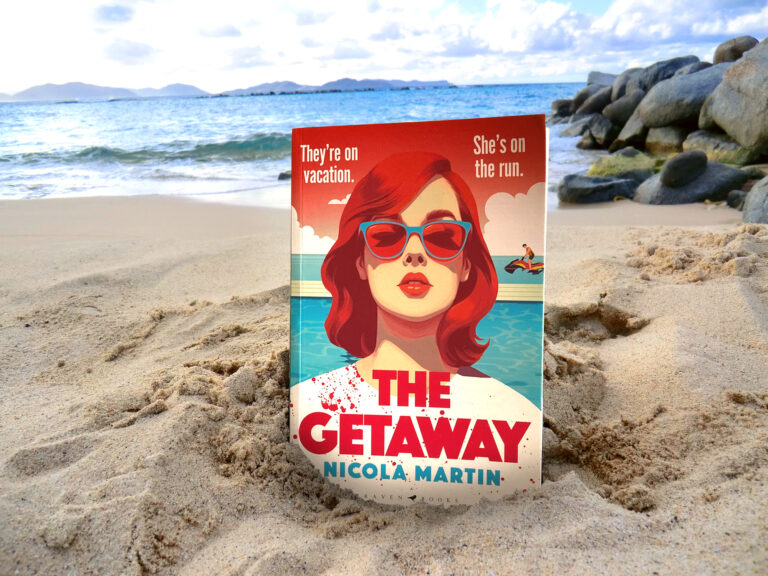
When I start writing a novel, I have a top-line idea in my mind. (For The Getaway, that top-line idea was: “What if you got a job working on a private island in the Caribbean and then someone was murdered?”) However, I often have very little else.
The great lie about writing fiction is that it requires one big idea and that’s it. In fact, writing a novel requires coming up with hundreds of smaller ideas that all tessellate perfectly.
For this reason, I keep on my computer a file that’s optimistically titled “amazing ideas.doc”. This is where I stash any stray kernels that might make for good stories. Most are not amazing; many are not even ideas. But they’re random thoughts that can tickle my brain and spark inspiration.
While brainstorming, I go through my amazing ideas file and grab things from it that might feed into my main idea, or simply anything that looks interesting to me today.
I’ve always liked Stephen King’s view on stories, which is that they’re about smashing ideas together. Carrie is not just a story about telekinesis. It’s a story about telekinesis + teenage bullying. By smashing together those two disparate ideas, boom, the magic appears.
Therefore I do a lot of idea-smashing, initially, and see if anything sticks.
Step 2. Skeleton Plan
Once the beginnings of a story start to cohere in my mind, I’ll try to come up with a one-page skeleton plan for my novel.
Since I write mysteries, I’ll know already that there needs to be a murder at the beginning and an unmasking of the killer at the end. I also like a big set piece for my final act. (The villain’s coming to get our heroine, she needs to get away, but whoops, the storm’s made it impossible to leave the island, oh no!)
This all gives me a starting point for building up a (very fuzzy) picture of my story.
To be clear, at this stage, my characters don’t have names or identities beyond “doctor” or “boyfriend”. There are always big gaps in the middle. But at least creating a skeleton plan lets me know what’s missing and what I still need to figure out.

Step 3. Character Work
I’m a great believer in the idea that characters are what make a novel compelling, so I like to dive into developing my characters early. (In fact, sometimes I’ll switch steps two and three and work on my characters before I have a concrete sense of what will happen in the story.)
At this stage, I want to know every character’s name, age and job, plus find out who they are in a broad sense. To do this, I carry out an abbreviated version of process that I describe in my free ebook, The 15-Minute Character Creator.
Then I’ll pick the three or four most important characters and develop them fully. This means carrying out the whole character creation process, including doing a few pages of first-person freewriting from their perspective.
In doing so, I’ll learn who they are, what they want, what they’re afraid of, how they spend their days, and what secrets they’re hiding. All of this helps to fill in the blanks of the plot.
Step 4. The Murders!
Two of the characters that I’ll definitely need to develop right up front are the killer and the murder victim. These are crucial to any mystery-thriller. If we don’t care about the victim, we don’t care about the mystery. If the killer is a dud, the book’s ending will be a let-down.
While doing character work about both killer and victim, I’ll have started to figure out the shape of the crime at the heart of my novel. But now is the time to get to know the details.
That means writing the murder(s), minute by minute, from the perspective of the killer. Not just why they did it, but how they did it – precisely.
How did they get to the crime scene? What was the murder weapon and why did they choose it? Did they clean up the crime scene and/or move the body? What time of the day or night was it? What were they wearing? What did they do afterwards?
I know. It sounds like a lot. You may prefer to handwave all this detail – don’t! I got this method of building mysteries from The Weekend Novelist Writes a Mystery, and I believe it’s the secret sauce to creating compelling crime stories.
Why? Because not only can you fix any potential plot holes (if it was midnight in the woods, how did the killer see well enough to commit this murder?), you can reverse-engineer tantalising clues to breadcrumb through your novel.
If the killer had to dispose of bloody clothing, that’s a clue your sleuth can find. If they were seen on the road coming home after the murder, that’s a clue. If they missed their anniversary dinner because they were moving the body, that’s a clue.
Step 5. Detailed Plan
Now that I know a lot about my main characters and how/why the novel’s crime was committed, the detail of the plot will naturally start coming together. Therefore, at this point, I flesh out my skeleton plan into several pages of a rough novel outline.
I’ll usually write down the novel’s five or six main story threads. This typically includes: the sleuth’s investigation of the murder, the protagonist’s emotional arc, the romantic subplot (if there is one), the build-up to whatever big set-piece will happen at the end of the novel. Then I’ll brainstorm key scenes I know I’ll need for all these story threads.
Once I have a list of story threads and scenes, some parts of the plot will fall into place smoothly. Other parts, I’ll end up reworking, moving around, deleting, recovering, reworking again.
It’s not an easy process, but I find that the more details I can nail down while planning, the easier the actual writing of the book will be.

Step 6. Story Beats
My outline is still very rough at this stage, but it’s begun to take shape. I’ve been writing long enough that I build “beats” into my novels without thinking about it. But now’s the time when I refer specifically to a beat sheet (I tend to use the Save the Cat one) and see how well the plot of my novel adheres to it.
Story beats, or genre beats, are a method of structuring a novel (or screenplay). They represent story elements or shifts in the narrative. Examples include the “inciting incident”, a change in the status quo that kicks off the action of the story. You’ll also find that, in many, many novels/movies, there’ll be a “midpoint twist”, where things are turned on their head when you reach the middle of the story.
Some beats are specific to a genre. Ever watched a rom-com where the hero “chases” the heroine across the city in order to confess his love? Yep, that’s a beat.
In crime fiction, other beats include the inevitable scene where the hero is trapped at the mercy of the killer.
Ever wondered why modern thrillers usually save their final, final twist for the very last page? That’s because “micro twist at the end” is another beat.
Some writers find beats a little cheesy. Yeah, sure, I won’t argue with that, but as cheesy as they may be, that doesn’t mean they’re useless.
There’s no rule that says you need to stick slavishly to any given beat sheet, but they’re a useful tool for spotting places where your plot has slowed down or you’ve given the protagonist too much of an easy ride.
In crime fiction, once your main character enters the final act, literally everything about their life should be falling apart. I often find that, in early iterations of my outline, things just aren’t bad enough for my heroine. Time to pile on even more pressure!
Step 7. Feedback
My novel outline is looking robust by this point – to me, at least. Now it’s time to find out what other people think.
At this stage, I’ll clean up my rough outline and create something that’s accessible enough for someone else to read. Sometimes this will be a standard two-page synopsis. Other times, I’ll create a more in-depth outline, with character descriptions and a scene-by-scene breakdown of the plot.
Now’s the time to take a deep breath and send my outline out into the world. I’ll send it to writer friends, my literary agent, and (if I have a contract at a publishing house) my editor.
I’m looking for big picture thoughts from these trusted early readers – anything that doesn’t make sense, anything clichéd/stupid, anything potentially offensive, and anything that might make the book harder to publish.
Obviously, there’s much crying and rending of garments at this stage (“why don’t you liiiike my stuuuufff??”), but it’s better to know what’s not working about my novel before I spend six months on a first draft that I have to throw in the bin. (Unfortunately, I’ve done this in the past.)
Step 8. Revising the Plot
Based on the feedback I’ve received, I’ll rework the plot to get rid of any clangers or weak points.
Step 9. More Character Work
Remember in Step 3, when I only did broad-brush character work on the non-core characters of my cast? Now’s the time to fill in those blanks.
Using my 15-Minute Character Creator method, I’ll flesh out all the characters that play an active role in my novel. I’ll also revisit my main characters, who I fleshed out previously, and do additional freewriting. Sometimes those characters will have shifted over the course of planning my novel and I need to spend more time making sure they feel ‘real’ to me.
At this stage, I’ll also do an all-important exercise, which I call “What is every character thinking during the novel?” In note form, I’ll write down their thoughts at every key moment in the plot. (What do they think when the sleuth arrives on the scene? What do they think when Character X dies? etc. etc.)
This exercise can be a little tedious, but I’m always surprised at what it throws up – “oh, yeah, I forgot those two characters hate each other and would probably have an argument following Plot Point Y.” The notes that arise from this exercise will also make it into the final manuscript, either as dialogue or background information that makes certain scenes easier for me to write.
Step 10. Working Outline
Using all this additional character work, I’m ready to create my working outline.
This crucial document builds upon the plot plan I created in Step 7, but it’s much more detailed. I’ll pile in any random snippets of dialogue that have come to me during the planning process, lists of clues that the sleuth needs to find at certain points, notes to myself about when to hit various story beats.
It’s a bit of a monster of a document, but it’s the blueprint I’ll use as I begin writing my first draft.
Phew! If you ever thought the hard work of writing a novel begins when you type “Chapter 1”, I hope this post has changed your mind. It starts many months beforehand!
Now, what are the planning tips I’d pass on to other writers? Here are five of them:

5 tips for planning your next novel
Keep your own ideas file. Don’t overthink what you put into it, just include any fragment of an idea or interesting fact that you come across in your everyday life.
Get to grips with story beats. They could transform your whole novel! I recommend checking out Save the Cat and Take Off Your Pants.
Build your characters early and in detail. Even if you don’t have the stomach for the amount of pre-planning and plotting that I do, I recommend spending some time getting to know your characters before you start writing in earnest. If your characters are bland, that’s difficult to fix in the edit, so make them vibrant right from the start. Check out my free ebook, The 15-Minute Character Creator, for my simple method for strong characterization.
Get feedback from writer friends before you start writing. I know, I know, soliciting feedback is nerve-racking, but you’ll save yourself heartache in the long run if you ask others to sense-check your story idea.
For mysteries, draw up a long list of clues. Knowing everything about your murder and crime scene from the start is essential if you’re writing a mystery. In the process, you’ll compile a list of clues. Brainstorm as many as possible. You won’t use all of them, but you’ll be surprised at how often you’ll find yourself wishing you had just one more clue to lead your sleuth down the right path.